
Lots of pics!
Battle of Beerywine –
AWI game report.

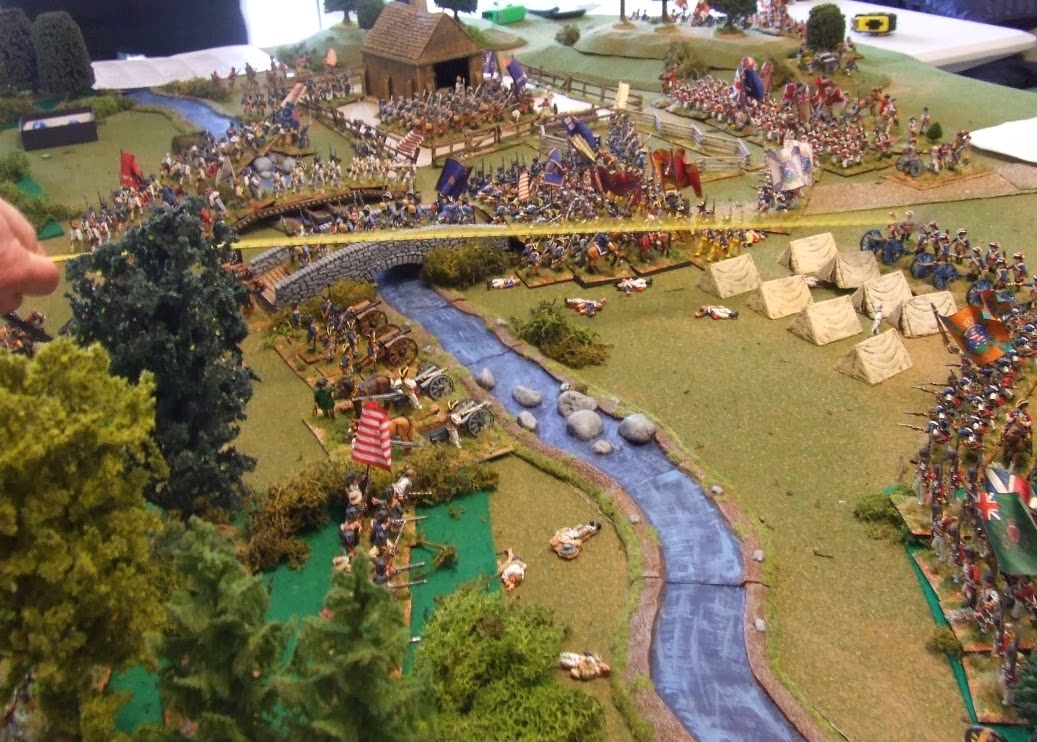
Basic table setup: a river with one bridge, a Hessian camp
in the centre and a small settlement.

Other side of the table.


Some dragoons and geese – just because…

…Alright because I’d just finished retouching them the day
before. Yes the flags are completely wrong but couldn’t be bothered changing
them.

Sneaky Americans move to their start positions. Note the
riflemen in the foreground.

Another view that shows the pontoon bridge they put up. The
rocks on the river below the pontoon are fordable. Hence the massed formation
right behind it. Note the Hessians in the camp start positions.


The Hessians start to react and throw out a hasty battle
line.


The Hessians win a vital initiative roll and charge into
some Continentals – swiftly sending them packing. More rebels take their place
but are starved of room to move.


Some of the aforementioned waves of British.

Yes – more of ‘em.

A shot of the game situation about turn 4.
Chris’ hand helpfully showing us the target that he insisted
on missing with his guns.

Around turn 5 and the high-water mark for the Americans. They’ve
taken a lot longer than wanted to clear a bit of room to move.

Some Loyalists trying to move toward the action.


Jaegers in the foreground that harangued and sniped at the
American right flank.


The Americans attempt to trade off space for time.


Redcoats have entered the settlement.

Pesky foot dragoons picking away at militia.


The game was scheduled for 10 turns and the umpire determined that the British would have achieved their objectives by end of turn 9 giving them victory by 1 turn. The Americans were getting concerned about army morale and were 4 units away from breaking. One unlucky turn could have broken the army so they decided to keep the army intact as their consolation prize. The Americans did a good job and came surprisingly close despite the losses.
The British and Allies managed a clear victory, largely due
to the Hessians that stymied any American progress across the bridge. Their
solid morale throws and pressure made it difficult for the Americans from turn
2. Winning the initiative rolls for first few turns was also significant.
Seemed that the rules went down well and worked for the
scenario. Somewhere around turn 4 the players were running independently with
the rules so that was a good sign. Not having to look up multiple charts and
using logic for anything tricky seemed to make the game flow well enough. I
think all the players will be happy to give them another go for the next time.Cheers,
Mick
Fantastic looking game Mick. Beautiful figures and great terrain.
ReplyDeleteWonderful pictures, love the figures and the battlefield, a great report!
ReplyDeleteGreat looking game! Rivals any Napoleonic game I've seen. Best, Dean
ReplyDeleteNicely done Mick! Glad to hear that you enjoyed the rules and that the players figured things out quickly.
ReplyDeleteThere is an option command radius found at the top of the movement column on the chart. Units that are more than 24" from their commander can only move half. You can easily adjust the distance to your liking.
I'm considering adding a rule whereby all American units have to roll a D6 to see what happens whenever thenBritish approach with 12" of them.
1-2 = rout; 3-4= fall back 12" in good order; 5-6= no effect on the Americans
I plan to test this soon so I don't know yet how it will work in a game
Jim
Thanks for the comments gents.
ReplyDeleteWe were aware of the command radius and used it in the earlier play tests. It was simply just forgotten about as we went about the game. Interesting ideas, Jim. Basically a test of nerves. A good idea for militia or green units at least. Would that be a once-off test per unit or each time they get within 12"?
Mick
Mick: I usually do not use the Command Radius option in my games. I find that the individual players create plenty of their own indecision and Fog of War without me creating rules for the same. :)
ReplyDeleteAnd yes, the test of nerves would only apply once per game for each American unit. Maybe this is more of a 1776 campaign year device as Continentals seem to have been giving a better account of themselves in 1777. I would dispense with the idea entirely for the post-Valley Forge Continental army, but then, who knows until it gets some play testing.
That makes sense and I agree about the player driven fog of war. If you have a sensible enough scenario the rules serve their purpose by allowing the game to play out in a clean, tidy manner.
DeleteFantastic looking game. I never get tired of seeing AWI redcoats. :-)
ReplyDeleteBenno
(Benno's Figures Forum)
Great work Mick loved it, nicely documented photo's and some lovely toys. Makes me want to hound DAF over his recent kickstarter project to get my new toys.
ReplyDelete